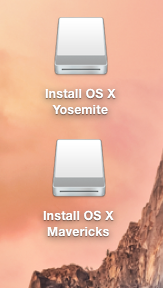
 Partition a 16 GB USB Drive into two volumes. Make each volume a bootable OS X Installer for two different versions, in this example Yosemite and Mavericks.
Erase:
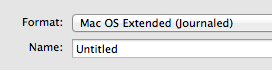
Using Disk Utilities, erase the USB using Mac OS Extended (Journaled).
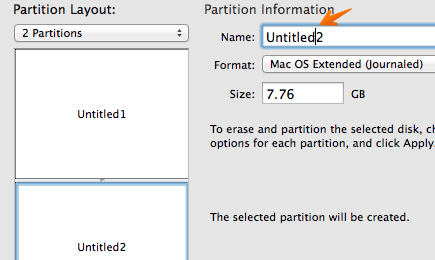
Partition:
Set each to Mac OS Extended (Journaled)
Take out the space in “Untitled1” and “Untitled2″
You can download the Yosemite installer and it will go into the Applications folder. Do not run the installer.
You will need to have a copy of the Mavericks installer from a previous download. It is no longer available from Apple. Place it in the Applications folder.
Copy and paste each of the following commands into a Terminal window. The location of the installers and the name of the Untitled volumes must match.
Make Mavericks USB boot drive (Untitled1)
sudo /Applications/Install\ OS\ X\ Mavericks.app/Contents/Resources/createinstallmedia –volume /Volumes/Untitled1 –applicationpath /Applications/Install\ OS\ X\ Mavericks.app —nointeraction
Make Yosemite boot drive (Untitled2)
sudo /Applications/Install\ OS\ X\ Yosemite.app/Contents/Resources/createinstallmedia –volume /Volumes/Untitled2 –applicationpath /Applications/Install\ OS\ X\ Yosemite.app –nointeraction
Once complete, you will have two bootable volumes that can be selected holding the “Option” key when starting up your Mac.